Super Users can create and manage your portfolios and sub-portfolios. These can be attributed to each individual property and data can be filtered using them.
For instructions on how to attribute these to your assets please see Step 3 of the adding a new property help page.
You cannot create sub-portfolios until you have portfolios in place so we will take you through the steps for portfolios first.
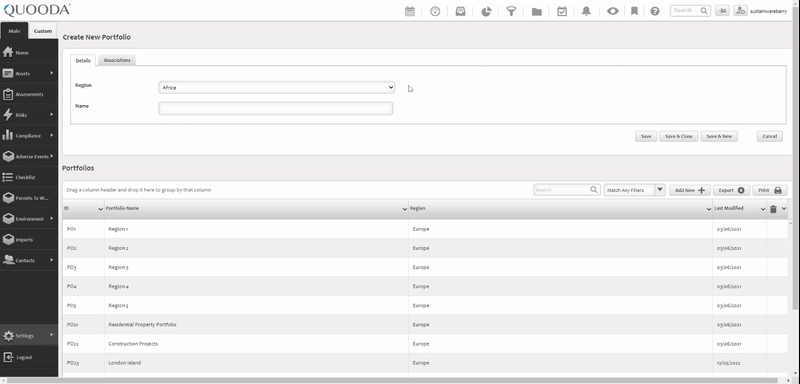
Step 1. Go to Settings > Portfolio Management > Portfolios

Step 2. Update or Add New
If you need to update an existing portfolio, you can find it within the table using the available search and filters. Click on it, and then select ‘Open Record’ to edit.
To add a new portfolio, select ‘Add New’.

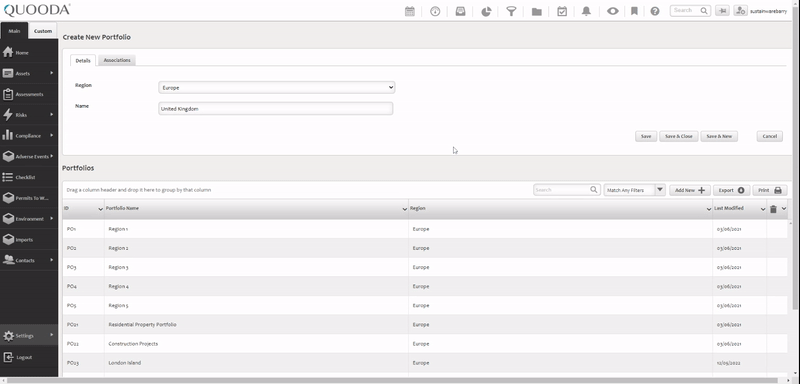
Step 3. Complete the details
If editing an existing record, the details will be pre-filled but can be amended as needed. New records will be blank.
- Select a region for your portfolio from the drop-down menu. Additional Regions can be added as required. To do this go to Settings > Common Data and select Regions.
- Name your portfolio
Step 4. Save your changes
There are 3 options available to do this:
- Save – This will save the changes but stays on the same screen so you can make further edits
- Save & Close – This will save the changes and return you to the portfolios table
- Save & New – This will save the changes and then open a fresh portfolio window so you can create another one
You will be asked to confirm your changes. Click ‘Yes, Continue’.
________________________________________________________________________________________________________________
Now that you have some portfolios, the following steps will allow you to create sub-portfolios if needed.
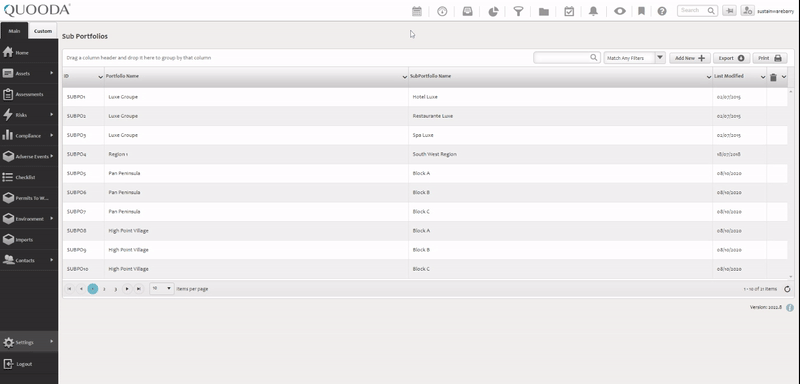
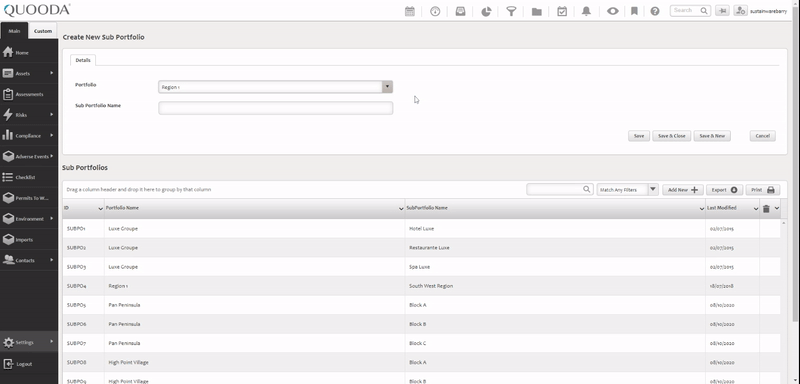
Step 1. Go to Settings > Portfolio Management > Sub Portfolios
Step 2. Update or Add New
If you need to update an existing sub-portfolio, you can find it within the table using the available search and filters. Click the sub-portfolio you would like to edit.
To add a new sub-portfolio, select ‘Add New’.
Step 3. Complete the details
If editing an existing record, the details will be pre-filled but can be amended as needed. New records will be blank.
- Select a portfolio for your sub-portfolio to sit within from the drop-down menu.
- Name your sub-portfolio
Step 4. Save your changes
There are 3 options available to do this:
- Save – This will save the changes but stays on the same screen so you can make further edits
- Save & Close – This will save the changes and return you to the sub-portfolios table
- Save & New – This will save the changes and then open a fresh sub-portfolio window so you can create another one
You will be asked to confirm your changes. Click ‘Yes, Continue’.