Managing agents is an additional data option that can be enabled and configured by Super Users. The data is captured on the property record and is used to filter reports, dashboards and the RAG grid.
For instructions on how to attribute these to your assets please see Step 3 of the adding a new property help page.
Step 1. Ensure the option is enabled
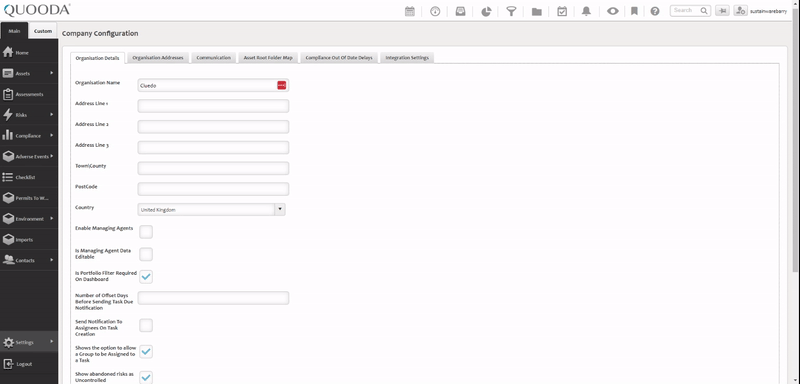
You may already be using this feature, if you are then you can skip this step. If you cannot see the managing agents options in your settings menu then you will need to follow this step to enable it.
- Go to Settings > Configuration > Company Configuration
- Check the ‘Enable Managing Agents’ and ‘Is Managing Agent Data Editable’ options
- Save the changes
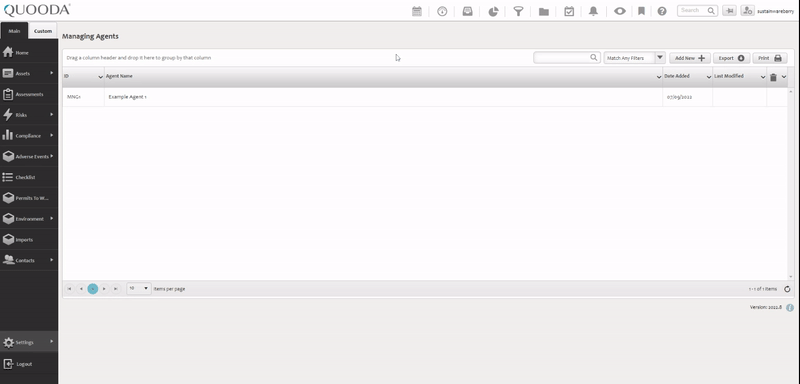
Step 2. Go to Settings > Managing agents
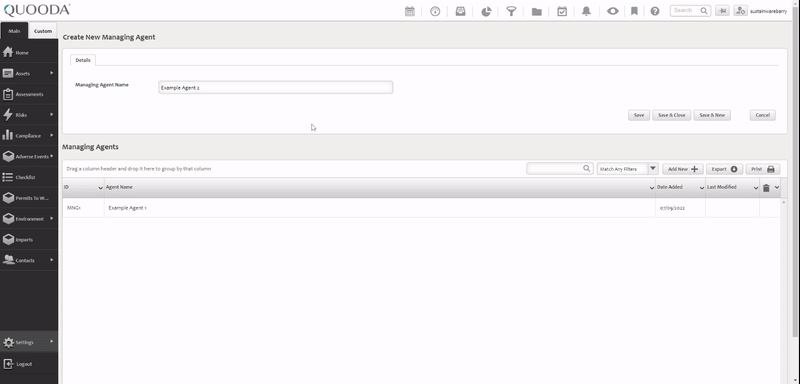
Step 3. Update or Add New?
If you need to update an existing managing agent, then you can find it within the table using the search and filters available. Click on it to edit.
To add a new managing agent, select ‘Add New’.
Step 4. Complete the details
If editing an existing record, the details will be pre-filled but can be amended as needed. New records will be blank. There is only one field to complete and that is the name of the managing agent.

Step 5. Save your changes
There are 3 options available to do this:
- Save – This will save the changes but stays on the same screen so you can make further edits
- Save & Close – This will save the changes and return you to the table view
- Save & New – This will save the changes and then open a fresh managing agent window so you can create another one